Hey Everyone!
I was SO excited for CookieCon 2020, and let me just tell you, it was a BLAST! I made this windmill cookie for my Sugar Show entry piece for the Home Sweet Home category. When I still had the idea in my head, I started researching to see if I could find any instructions for the tin look I was wanting to achieve and could not locate anything. So, I decided I would document my process so that it may help others looking for the same thing.
I bought a tray from Hobby Lobby that kind of had the tin coloring I was looking for to help with inspiration.
Supplies I used:
- Amerimist Silver Airbrush color
- Americolor Black gel color
- Americolor White gel color
- Silver Luster Dust
- Silver Leaf
- Everclear 190 proof alcohol
- Tweezers (for baking only)
- Paintbrush (for baking only- needs to be Nylon bristles)
- Paint Palette
- Cup of water

I mixed the black and white gel colors to achieve four different grays.
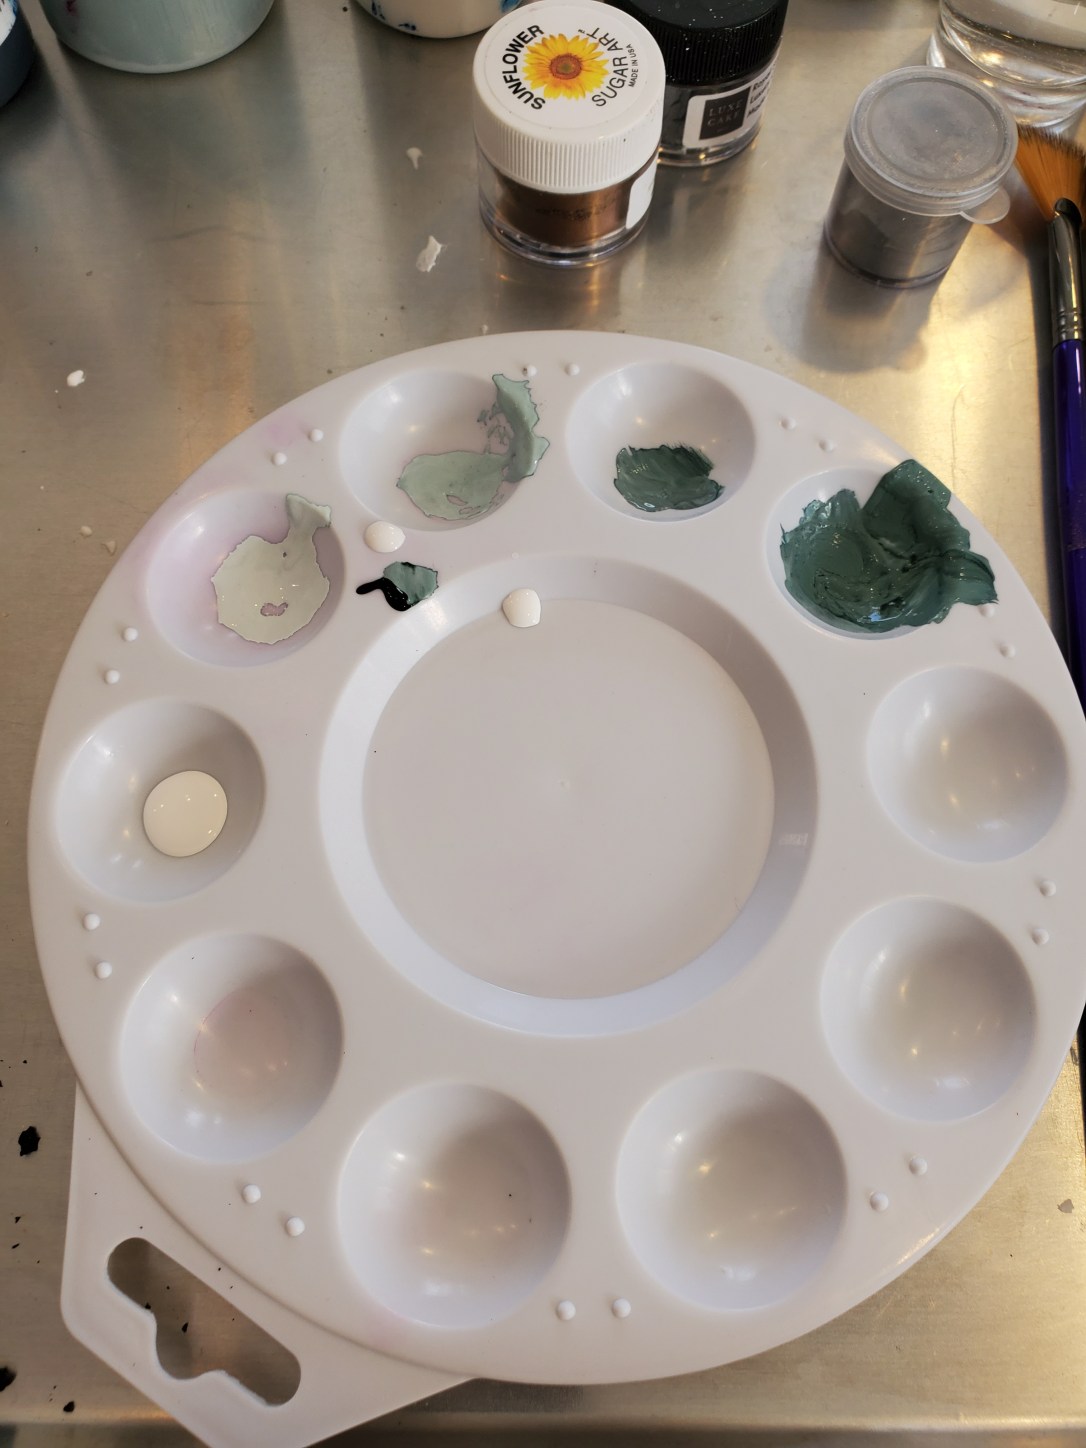
I used this flat brush that I believe was a Wilton brand paint brush. You can use any paintbrush as long as it has Nylon bristles and new, of if it has only ever been used with edible products. You may see the fan brush in the picture next to the paint palette, but I did not use it for the tin look.

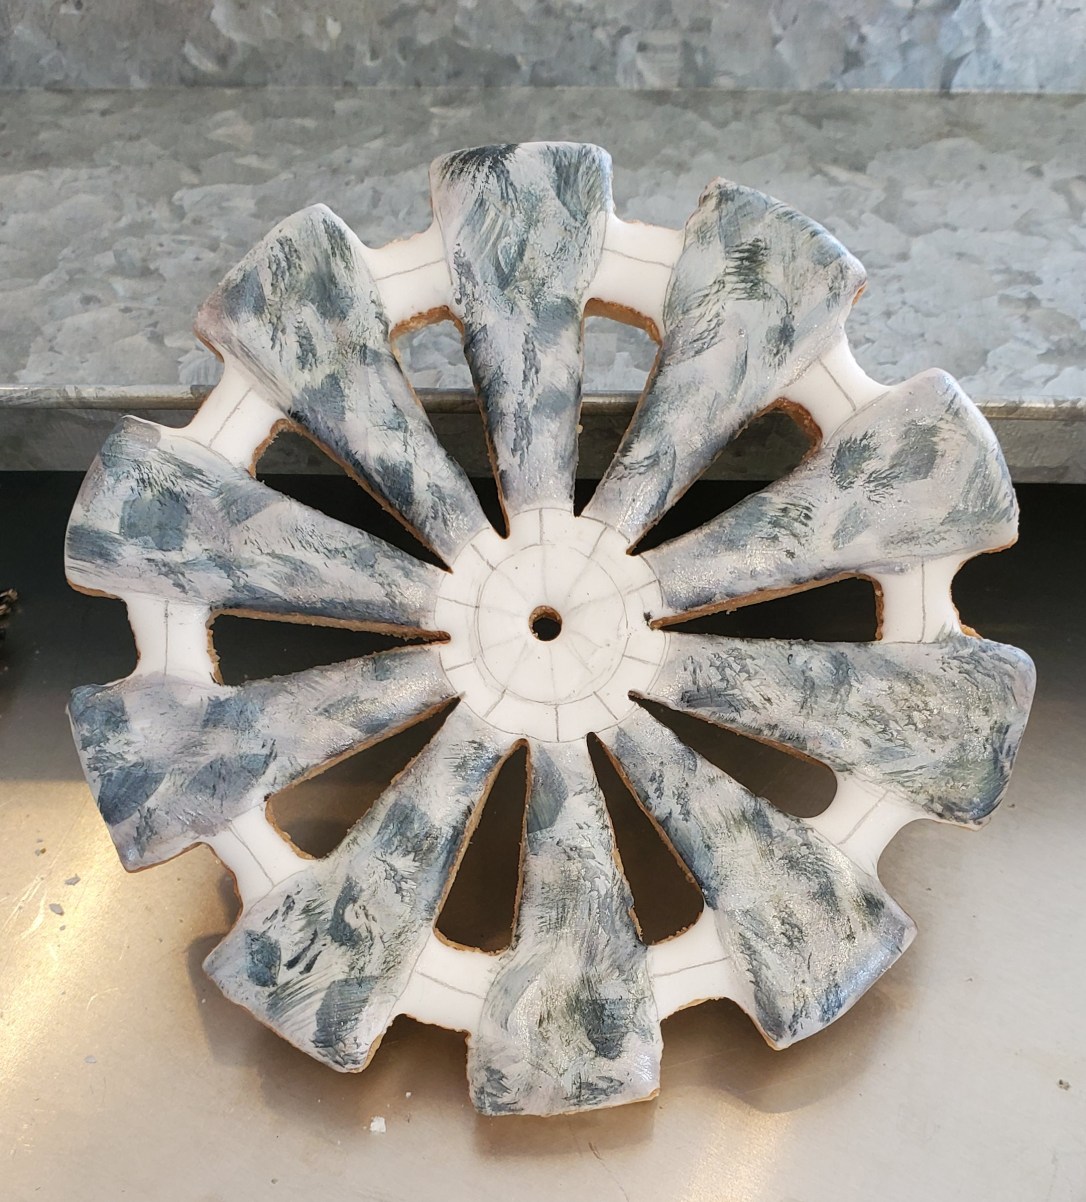
I used this brush and started with the darkest gray and started to paint the blades using short cross hatch style strokes.

After I did the same technique to all blades, I washed my brush and chose a lighter gray and continued cross hatch style strokes in a random pattern. I tried to make each blade slightly different so they didn’t look identical.

Repeat these steps until most of the white is covered and let it dry.
After allowing the cookie to dry, I mixed a little Everclear with my Silver luster dust to create a paint, and poured a little of the Silver airbrush color into a new spot on my paint palette. Using the same previous cross hatch technique, I applied the silver luster dust paint first, and then used the airbrush color to do the same. At this point, their should not be any white remaining on the blades.
I used tweezers to tear small pieces of silver leaf and used a barely wet paintbrush to apply just a little dampness to the cookie where you want to add the silver leaf. When the silver leaf has adhered to the cookie, I used the same barely damp paintbrush to smooth out any wrinkles. Repeat this step until you are happy with the look. Yes, this took me awhile, lol.
You can see the tray coloring in the background is now very similar to the cookie.
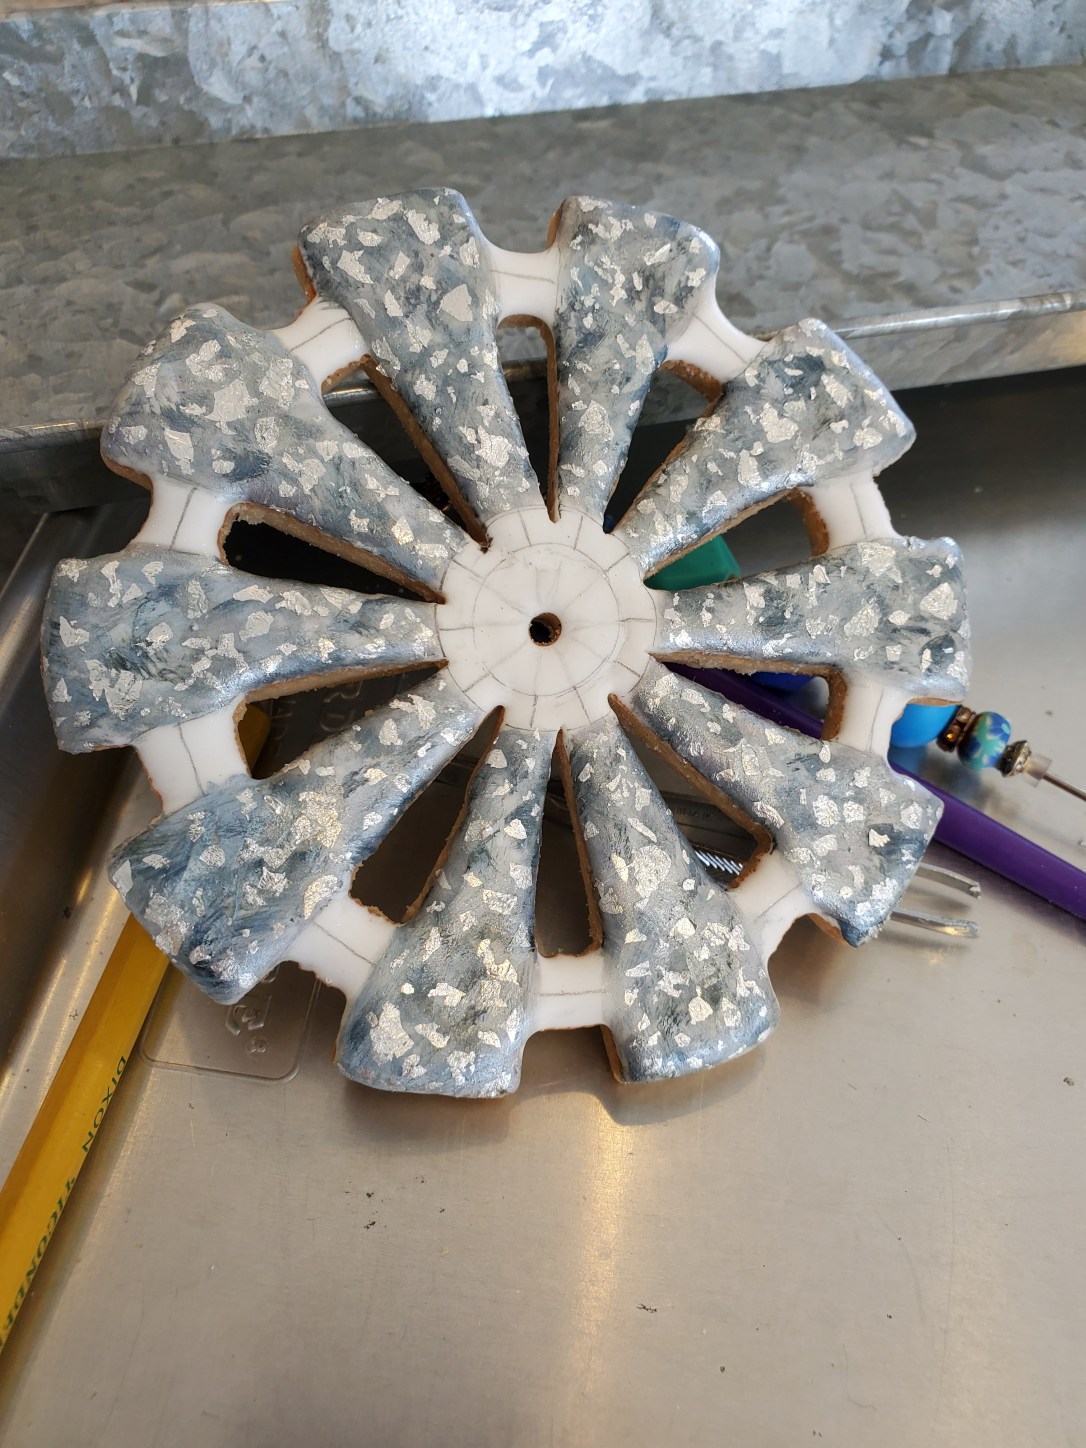
You can always go back and touch up any area you want, and you can always use a damp paintbrush with just water to help blend colors as well.
When I was happy with my blades, I used a copper airbrush color and luster dust to trace over my pencil marks to attach the blades.

And there you have it, a nice galvanized tin finish!


I will create another post in the future about the mechanical construction, and the painted base cookie. If you are interested in the cookie cutter, just shoot me a message! This one was 5 1/2″ tall and wide.